Service Manager
Working with Object Matching and Related Items
This topic describes how to use object matching to configure a related items search. Object matching determines the items that are listed in the Related Items pane.
Object matching is a type of search that allows you to search other business objects while inside a form. The search can originate:
•From a field on a form that has an associated search icon. An example is the Summary field on the Details tab for an incident. The application displays the results in the Related Items pane (see Using Related Items and Object Matching).
Summary Search
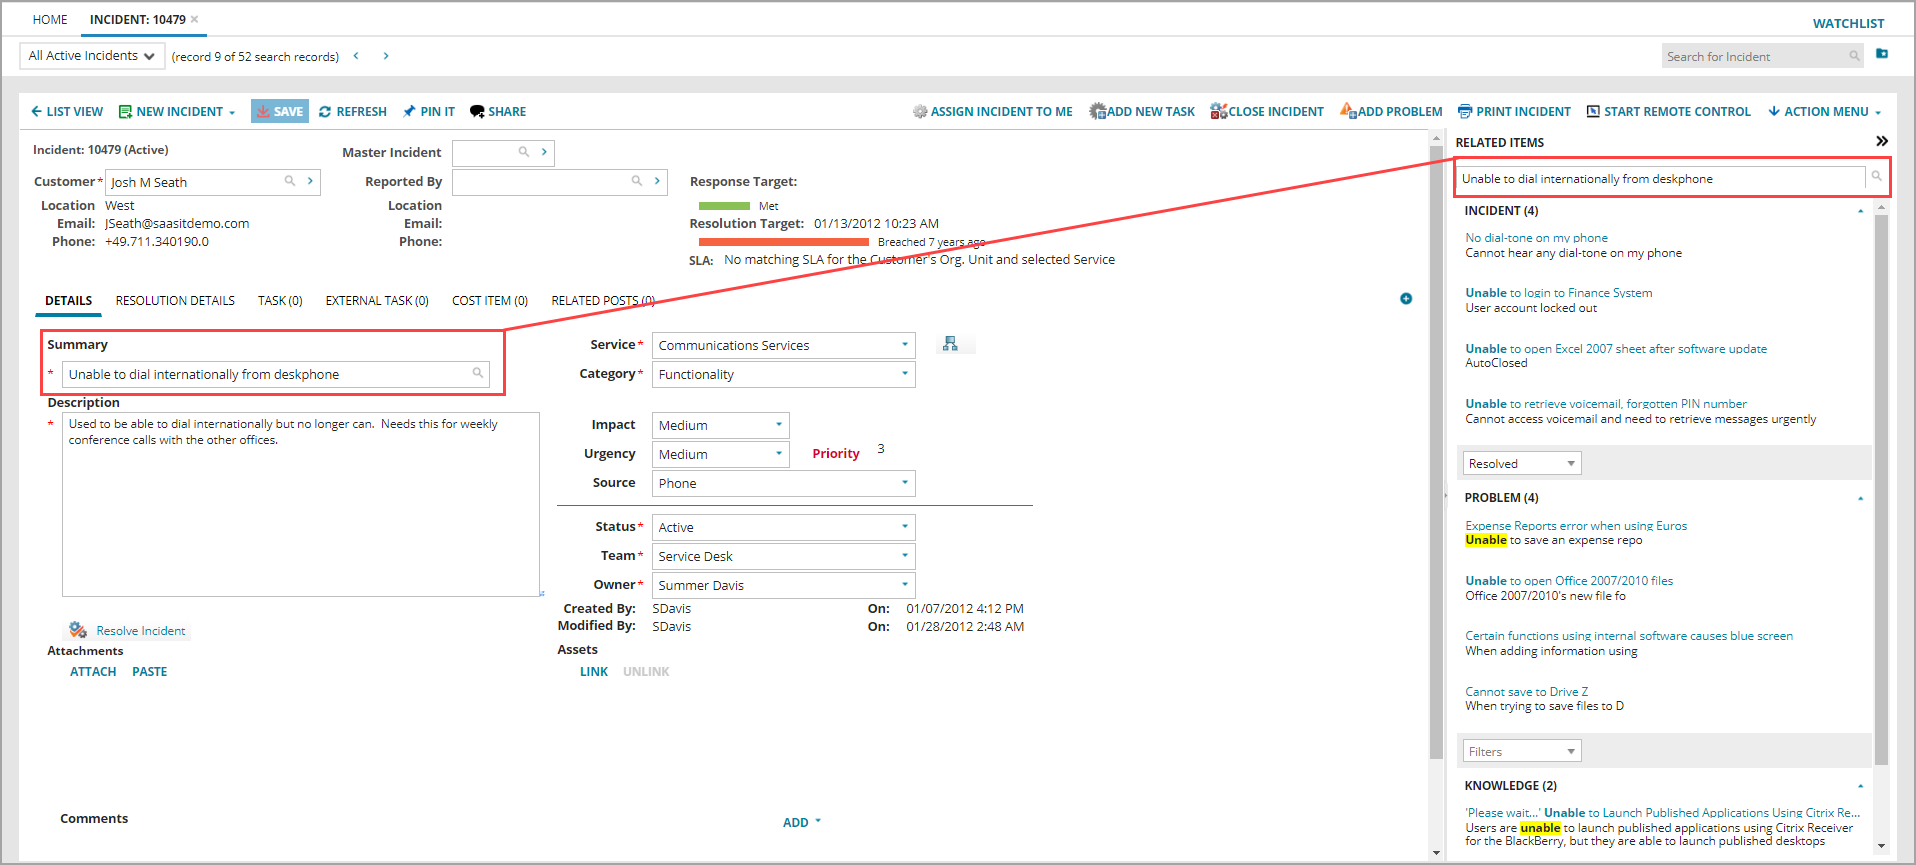
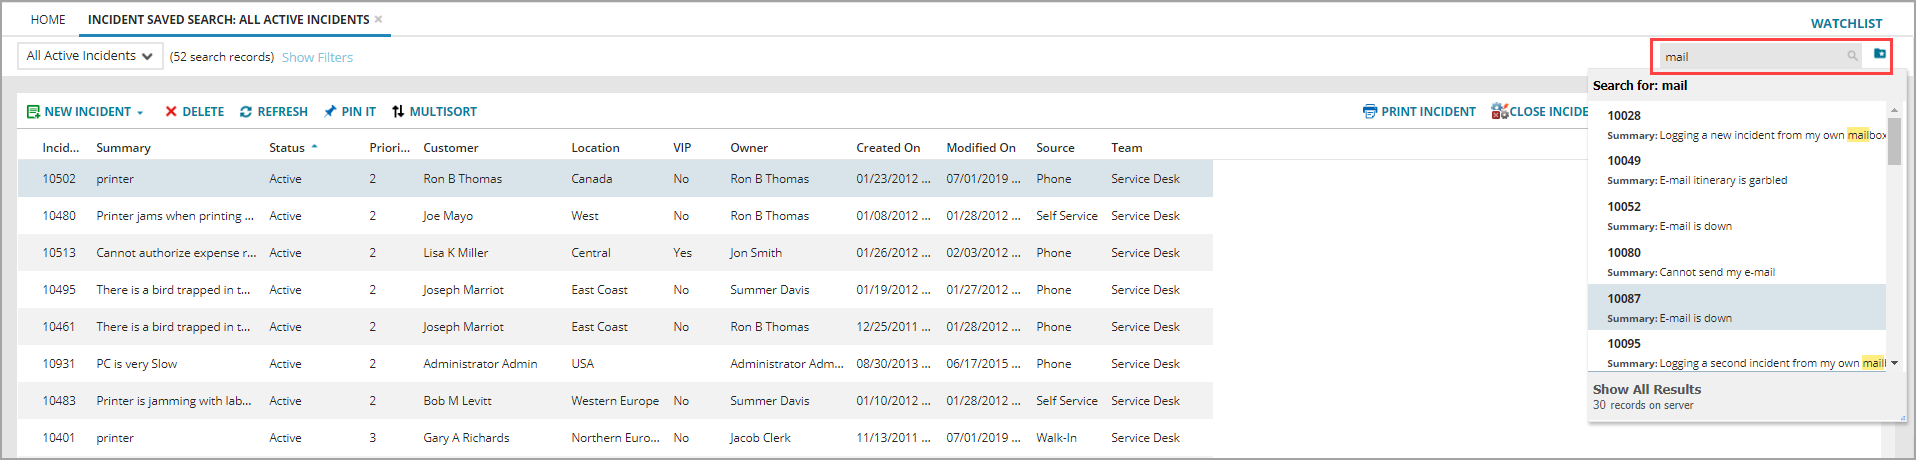
•When you enter a search phrase into the Search text box in the search results panel and start the search.
Search Box
The application ranks the business objects that match the search criteria by how closely they match the current business object. The application lists these matching business objects in the search results panel in the form of the current business object. The Incident, Knowledge, and Problem business objects have object matching enabled by default.
When the application searches business objects, the object matching function performs a Microsoft SQL full-text search in all full-text indexed fields in the business object tables. The Microsoft SQL engine also ranks the business objects.
Viewing Object Matching Lists
The Object Matching Lists workspace lists all of the business objects that use object matching.
1.From the Configuration Console, click Build > Automation Tools > Object Matching Lists to open the Object Matching Lists workspace. The application displays a list of object matching business objects.
2.Open an item from the list to view the object matching parameters.
Creating an Object Matching Configuration
Follow these steps to create a new object matching configuration.
1.From the Configuration Console, go to Build > Business Objects to open the Business Objects workspace.
2.Open the business object to configure object matching for.
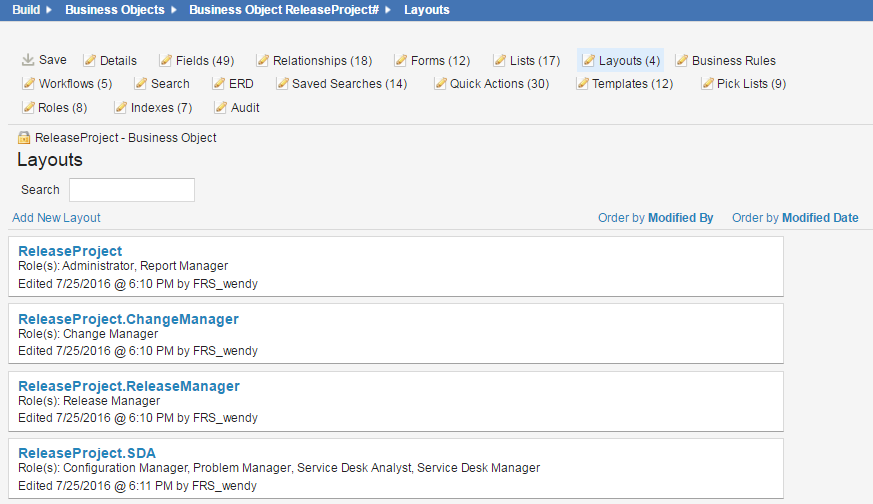
3.Click the Layouts tab. The application displays a list of all the layouts used for this business object.
List of Layouts
4.Determine the layout to use. See Determining the Layout to Use for an Object Matching Configuration to determine which layout to use.
5.Open the layout. The application opens the Edit Layout workspace.
6.Under the Views in this layout section, click formView to open the form view of the layout.
7.(Optional) Click Try our new look! to go to the new for view editor.
8.In the Layout section, click Edit Properties. The application displays the Form View Properties Editor dialog box.
9.Check Enable Matching panel. The application displays the Business_object matching for the layout_name layout dialog box.
Business Object Matching for the Layout Name Dialog Box

10.Enter information into the following fields:
| Field | Description |
|---|---|
| Display Name | The name of this object matching display. |
| Run business_object Matching whenever the field --- changes | The field on which to run object matching. Choose a field name from the drop-down list. |
| Match keywords from business_object's --- field |
The field on which to match keywords. Choose a field name from the drop-down list. |
| Object Name |
The name of the business object to enable object matching for. Choose a business object name from the drop-down list. |
11.Click Edit Preview (Not Set) or Edit Preview to set the preview format.
Preview Item Format
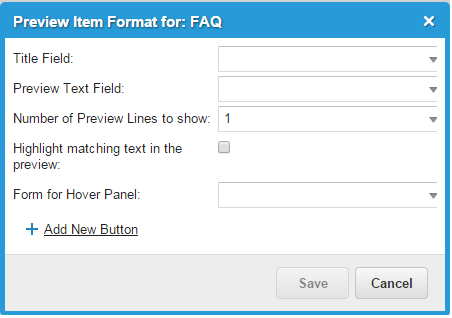
The next step determines where the information for the object matching panel comes from. The business object that you selected in the previous step determines your choices in the next step.
12.Enter information into the following fields:
| Field | Description |
|---|---|
| Title Field | The title. Choose from the drop-down list. |
| Preview Text Field | The preview text to display. |
| Number of Preview Lines to show | The number of preview lines to display. Select from 1 to 10. |
| Highlight matching text in the preview | Highlights the matching text in the preview. |
| Form for Hover Panel | The form to display when hovering. |
When you search for a business object, the matching business object appears in the panel on the right side.
13.Add buttons as needed, by following these steps:
| a. | Click Add New Button. The application displays the Create new button dialog box. |
| b. | In the Button Label field, enter a name for the button. |
| c. | Check Link matched business_object with main business_object#. |
| d. | Click Add Field. |
| e. | Select a field from the drop-down menu. |
| f. | Enter the name of a field to update the field with, such as owner, category, status, and service. |
| g. | Click Save. |
14.In the Preview Item Format page, click Save.
15.Add more business objects to search in by doing the following:
The order in which you add the business objects is the order in which these business objects are displayed in the Related Items panel. To change the order of the business objects in the Related Items panel, delete the business objects and add them back in the order in which you want them to appear.
| a. | In the Search for matches in section, click the add icon  . . |
| b. | Select a business object from the Object Name drop-down list. |
| c. | Click Edit Preview (Not Set) to set the preview format. |
| d. | Enter information into the fields and create buttons as needed. |
In the example below, the user added the knowledge, document, error message, patch, Q&A, and reference business objects to the list of places to search for.
Adding Business Objects to be Searched In

16.In the Business_object matching for the layout_name layout dialog box, click Save.
17.In the Form View Properties Editor page, click Save.
18.Click Save to save the layout.
Editing an Existing Object Matching Configuration
After you create the object matching configuration, you can edit it.
1.From the Configuration Console, go to Build > Automation Tools > Object Matching Lists. The application displays a list of all of the object matching configurations that have been created.
2.Click an object matching configuration to edit it.
Determining the Layout to Use for an Object Matching Configuration
Determine the layout to use by doing the following:
1.From the Configuration Console, click Configure > Users and Permissions > Roles and Permissions to open the Roles and Permissions workspace.
2.Click Self Service to select the Self Service role. The application displays the Role Details page.
3.Click the Top Level Tabs tab. The application displays all of the workspaces that appear in the Service Manager Application for this role.
4.From the list of top-level tabs, click the name of the tab to configure object matching for. For example, click MyItems.
MyItems Top-Level Tab Configuration
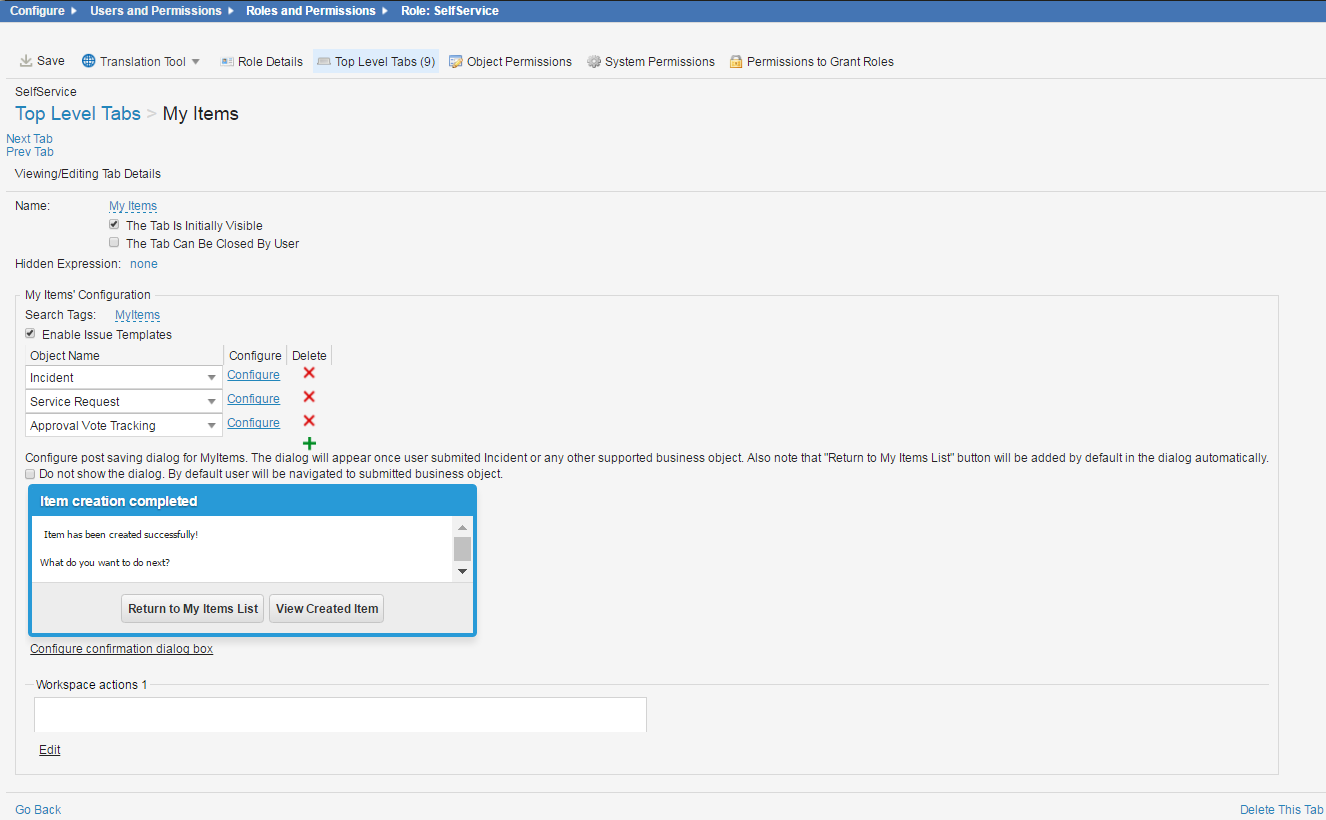
5.Under the My Items' Configuration section, next to a business object name, click Configure.
If you do not see a list of business object names with the word Configure next to them, you cannot create an object matching configuration for this workspace. Object matching configurations are mostly used for the My Items and Search workspaces, but can be used on other workspaces.
The application displays the Select business_object_name objects layout dialog box showing the layouts that are being used.
List of Layouts for this Object Matching Configuration
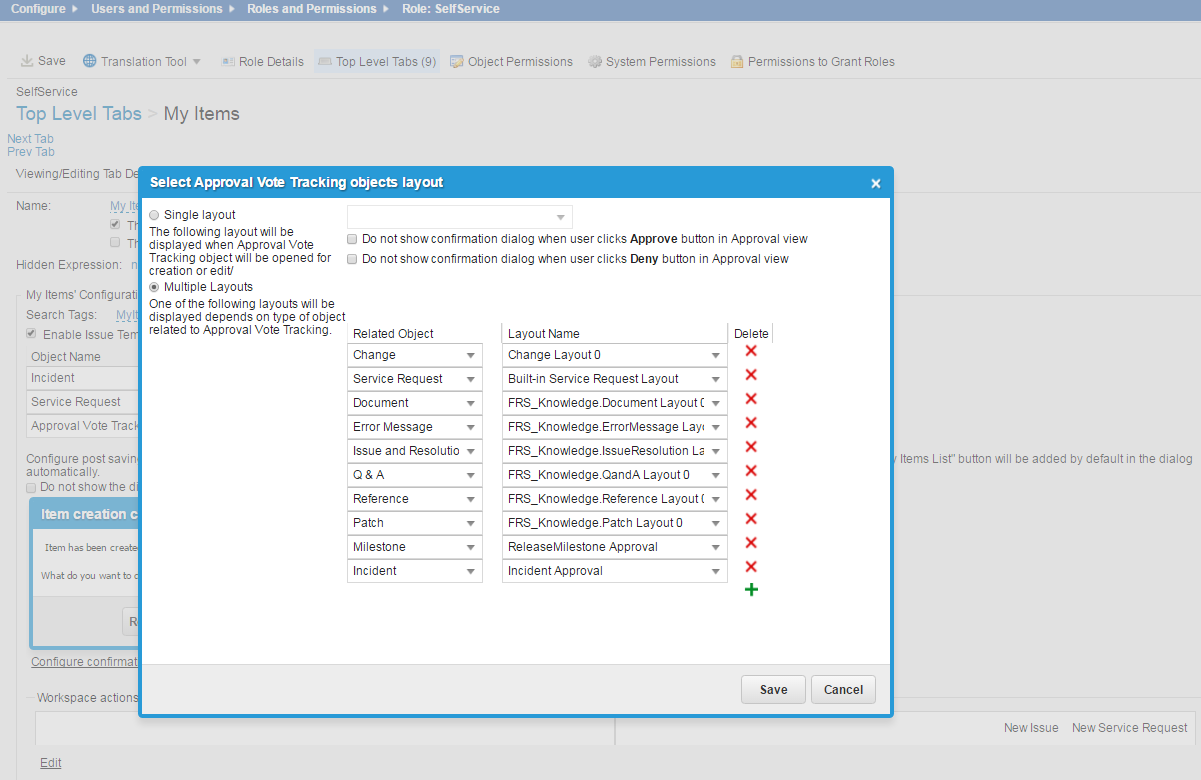
6.Select a layout to configure object matching for.
7.Click Cancel.
Was this article useful?
Copyright © 2019, Ivanti. All rights reserved.